Showing posts with label Family Art Projects. Show all posts

Friday, October 29, 2010

Peace Train!

For the fourth October in a row the stakes were once again high. The pressure has been mounting for weeks now. The tension around here has been so great you could slice it with a knife!

"Boo in the School" took place earlier today at The Washington Center, Ben's special needs school. Because the bar has been set so high by the previous three Halloween costumes, two of which were the creative expertise of Ben's nurses, the expectation now is for us to at least make an attempt to match the previous year's effort. Thankfully we didn't disappoint.

Thought and preparations actually began in earnest around the end of August. The construction included our entire family as well as Nurse Tracy and two of Jessie's closest friends. This past week was a flurry of cardboard, duct tape, paint, and the down-loading of four versions of the song "Peace Train." One of them is actually an "Africanized" arrangement in honor of Tracy's native South Africa.

So we are happy to report that for the third year in a row, Ben garnered the top prize at his school! Now the hard part begins: trying to figure out what we will do next year...
 
 All aboard The Peace Train! Just for the day Tracy became a conductor rather than a nurse. Note the working light at the front of the train.

 Our little engineer gets ready for the parade.

Our crew prepping for the judges. If you look closely you will see Jessie's iPod which was playing those Cat Stevens/Yusef Islam songs in sequence. Homage in a variety of bright colors to special peace-makers including Nelson Mandela, John Lennon, Jimi Hendrix, Martin Luther King Jr., and Bono. Although I painted the base coats of red and black Jessie and her friends (as you will see in another post this weekend) did all of the colorful decorations.

Thursday, September 27, 2007

Edventure Family Art
Project #3:

Sculpey Sculptures


Special Note: The day totally got away from me so I did not get to finish answering the questions asked of us the other day. In a nutshell we're putting together a blog entry about how to approach exceptional children and their families. It's such an important topic that Joan (my wife) is contributing to it as well. We're roughly halfway finished, not because it is such a complicated issue but we both just saw each other for the first time today about 15 minutes ago!

Which reminds me to let you know that we have another secret to share later this weekend. This time it's not about any television appearances or media coverage for Ben. It involves something I've just recently become a part of that is extremely exciting as a working artist within my community.

In the mean time let us tell you about our final project that we have put together for our visits to EdVenture museum this month. Since we've gotten such a great response from you I'll share more art projects your family can do at home in the coming months!


Materials: Sculpey III Oven Bake Clay, plastic picnic cutlery, metal thumbtacks, and wax paper used for cooking.

Overview: Sculpey is soft clay that remains pliable until you bake it in an oven. Think of a softer version of Play Dough that never dries out! It comes in almost a limitless amount of colors including some that glow-in-the-dark. The great thing about this product is that you don’t have to make the artwork permanent. Once you’ve completed an art therapy session just put the clay aside for another day! I've had our package of clays for about two months and it's just as pliable as the day I bought it! We've even left some of it sitting out for about a month on Ben's art table and actually used it last weekend.

For permanent artwork bake the clay on an oven-proof glass surface at 275 degrees for 15 minutes (add an additional 15 minutes for each ¼” of thickness). Once you’ve baked the clay it can be sanded, polished, drilled, carved, or painted (with your acrylic paints from the second project!).

Uses: Limitless! We recommend starting with simple projects like making buttons grandmother can sew onto a sweater. We also found a neat creation mom or dad can carry to the office to show off to coworkers. Make a small button and then wrap the clay around the flat part of a metal thumbtack allowing the pin to protrude through then bake it (do not use the plastic push pins since they will melt). Now they will have a special push pin to post memos on the office bulletin board!

There are so many projects that Ben and I suggest you visit Sculpey's website and check out the hundreds of ideas they have.

Tips: Use the extruders sold by Play Dough to add more fun at art time. Also if your child is like Ben and has limited fine motor skill in his hands, work with the clay yourself to make it more pliable. The longer you work with it the softer it becomes. Also we discovered that it's better to glue the thumbtacks onto the the back once they are baked.

Total Investment: $25 or less. We started with the Sampler Pack which includes 30 1-ounce bars of clay. We’ve yet to replace any of the bars but replacement bars (2 oz.) are usually around $1.50 each. The Multi Pack includes 10 2-ounce bars for around $15.

Where to find: the same craft stores mentioned before but we’ve seen it at toy stores and even at WalMart.

Wednesday, September 26, 2007

Edventure Family Art
Project #2:

Canvas Painting


Special Note: If you read the comments from yesterday's post (which I encourage all our visitors to always do since many readers of this blog contribute excellent commentary) an anonymous writer asked an obvious heartfelt question about how to approach a special needs family in public or just simply how to respond to the situation that I wrote about. At the suggestion of Gretchen (Simon's mom) I am going to answer that tomorrow with blog entry. In all honesty that maybe the most important question asked of us since we began blogging a little over a year ago.

If we are to help change the level of awareness in regards to special needs concerns then we as families better be prepared to open up our lives somewhat to the general public. In all honesty I was completely caught off guard Saturday and given the the theme of the day I feel a bit embarrassed for not being prepared. The simplest way to establish dialog with anyone is making them feel comfortable to approach us. That child who "confronted us" obviously did and I missed out on an opportunity to educate a young mind.

I want to pick my wife's brain tonight about her thoughts on this. We have quite different personalities. I'm (obviously) the extrovert while she's the introvert. Because of that she is much less likely to suffer "foot in mouth disease" so I'd like to get her opinion before blogging about it. So on to today's entry...


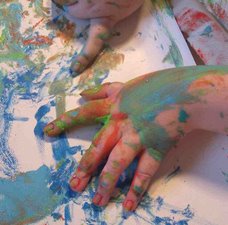
Introduction: Ben and I would like to share with you some fun easy-to-do projects that your family can complete at home! If you have an exceptional child (or children) these projects can be even more beneficial serving as a form of art therapy. Our family can honestly say that we have seen improvement in Ben’s communication and fine motor skills once we began a regular “art class” for him!

We have three projects we’ll tell you about to get your started. After that be as creative as possible! These craft ideas just scratch the surface when it comes to ideas for art therapy. Share them with your friends and be sure to check out our blog regularly for more ideas and news about our journey!

When we go shopping at craft stores we ALWAYS spend a little extra time roaming the aisles in hopes we find new materials to work with. The main thing to consider when trying new materials is TOXICITY! Generally if it can be cleaned up with soap and water you should be safe.

Materials: Fredrix Artist Canvas Panels, acrylic craft paint (our favorites are Delta Creamcoat and Anita’s All-Purpose Acrylic), cheap paint brushes, sponges, rags, old t-shirts (for a smock), clean up with soap and warm water.

Overview: Let your kids become a real artist! Essentially you are letting them paint like a professional painter only using less expensive materials. Encourage them to cover the entire canvas panel. The best way to achieve this is start small. Canvas panels usually come in sets of three beginning at 5” x 7” all the way up to 16” x 20”. Ben prefers 8” x 10” which allows him to reach all of the surface area. Also keep in mind that the smaller works are much easier to display.

Uses: Since all the panels are standard frame sizes they make a nice small adornment for a wall. You can also buy stick-on magnets to create “refrigerator art” or even better, an interchangeable gallery! A customer of ours came up with this idea. He glued Velcro to the back of the panels and to a wall in his home. He has several themes of ours including Christmas trees, dragonflies, hot peppers, and flowers. Depending on the season he can decorate accordingly!

Costs: the panels are usually sold in a pack of 3 for less than $4. Larger panels may cost up to $3 each. The 2-ounce bottles of paint are sold for less than $1 each. Watch for special pricing which can get them down to around 30 cents apiece! For children with limited motion like Ben let them use their hands or a small sponge. The paints are non-toxic so there are no worries about hands to the mouth.

Total investment: $15 or less depending on the size of the panels and colors you choose.

Where to find: A.C. Moore, Michael’s, Hobby Lobby, or any arts & crafts store.

Monday, September 24, 2007

Edventure Family Art
Project #1:

Tile Painting

As promised over the next few days I'll fill you in on the specifics of the art projects we introduced to the folks in Columbia over the weekend. The first one seemed to be the most popular with the Holidays just around the corner. You could literally see the wheels turning in many a parent's brain imagining gift ideas for loved ones.


Materials: Liquitex “Glossies” High Gloss Acrylic Enamel paint, 4” x 4” ceramic tiles, cheap paint brushes, sponges, rags, old t-shirts (for a smock), clean up with soap and warm water.

Overview: Since it’s getting close to the holiday season let your kids make a gift that will last a lifetime! Essentially this is the same process as before with only one more step. Once the painting is completed let the tile dry for 24 hours. After drying place it in a cool oven and then bake it for 45 minutes at 325 degrees. Remove the tile after it cools.

Tips: Because the paint has a “transparent” nature it may take several layers of paint to get to the consistency you like. That’s why we will do about a half dozen of these at a time. We can start with one color, paint a tile, then put it aside and move on to another tile. By the time we’re ready for another color the first tile is dry and ready for painting again.

If you are going to hang the tile as a decoration we suggest you drill a hole in the tile BEFORE YOUR CHILD STARTS PAINTING. Be sure you use a masonry bit as well. If you forget this part it is best to fashion some sort of hanger to the rear by gluing it on. Otherwise there’s a good chance you’ll crack the heat set surface of the tile by trying to drill a spot for it.

Uses: Discover a variety of purposes for these tiles from functioning as trivets or coasters to decorating a Christmas tree. Once they are complete you can glue felt to the rear surface so that they won’t scratch counters or tables. For hanging decorations we suggest you use the smaller 2” x 2” tiles. We also found that 6" x 6" tiles make for a better sized trivet.

Total investment: $20 or less depending on how many Glossies you begin with. They are generally around $2.75 for a 2-ounce bottle but the paint will go a lot further than the acrylic craft paint. We recommend starting with a minimum of three colors. Tiles can easily be found for around 20 to 30 cents apiece.

Where to find: get tiles at Home Depot or Lowe’s. The Glossies can always be found at A.C. Moore, sometimes found at Michael’s, and rarely at Hobby Lobby. Check also with your local hobby store; the kind that sells model cars and train sets.

Finally here are some links to on-line craft suppliers. They generally offer sales on art supplies that can really save you money versus your local craft store. Many times these folks will offer free shipping for orders over a certain price. Therefore another tip we suggest is getting together with other families in your child’s class and order all of your supplies at the same time! All we can say now is good luck and have a great time in art class!

AllArtSupplies.com
JerrysArtarama.com
ASWexpress.com
MisterArt.com