 Edventure Family Art
Project #1:
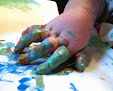
Tile Painting
As promised over the next few days I'll fill you in on the specifics of the art projects we introduced to the folks in Columbia over the weekend. The first one seemed to be the most popular with the Holidays just around the corner. You could literally see the wheels turning in many a parent's brain imagining gift ideas for loved ones.
Materials: Liquitex “Glossies” High Gloss Acrylic Enamel paint, 4” x 4” ceramic tiles, cheap paint brushes, sponges, rags, old t-shirts (for a smock), clean up with soap and warm water.
Overview: Since it’s getting close to the holiday season let your kids make a gift that will last a lifetime! Essentially this is the same process as before with only one more step. Once the painting is completed let the tile dry for 24 hours. After drying place it in a cool oven and then bake it for 45 minutes at 325 degrees. Remove the tile after it cools.
Tips: Because the paint has a “transparent” nature it may take several layers of paint to get to the consistency you like. That’s why we will do about a half dozen of these at a time. We can start with one color, paint a tile, then put it aside and move on to another tile. By the time we’re ready for another color the first tile is dry and ready for painting again.
If you are going to hang the tile as a decoration we suggest you drill a hole in the tile BEFORE YOUR CHILD STARTS PAINTING. Be sure you use a masonry bit as well. If you forget this part it is best to fashion some sort of hanger to the rear by gluing it on. Otherwise there’s a good chance you’ll crack the heat set surface of the tile by trying to drill a spot for it.
Uses: Discover a variety of purposes for these tiles from functioning as trivets or coasters to decorating a Christmas tree. Once they are complete you can glue felt to the rear surface so that they won’t scratch counters or tables. For hanging decorations we suggest you use the smaller 2” x 2” tiles. We also found that 6" x 6" tiles make for a better sized trivet.
Total investment: $20 or less depending on how many Glossies you begin with. They are generally around $2.75 for a 2-ounce bottle but the paint will go a lot further than the acrylic craft paint. We recommend starting with a minimum of three colors. Tiles can easily be found for around 20 to 30 cents apiece.
Where to find: get tiles at Home Depot or Lowe’s. The Glossies can always be found at A.C. Moore, sometimes found at Michael’s, and rarely at Hobby Lobby. Check also with your local hobby store; the kind that sells model cars and train sets.
Finally here are some links to on-line craft suppliers. They generally offer sales on art supplies that can really save you money versus your local craft store. Many times these folks will offer free shipping for orders over a certain price. Therefore another tip we suggest is getting together with other families in your child’s class and order all of your supplies at the same time! All we can say now is good luck and have a great time in art class!
AllArtSupplies.com
JerrysArtarama.com
ASWexpress.com
MisterArt.com
Monday, September 24, 2007
Subscribe to:
Post Comments (Atom)


2 comments:
oh I love this idea!
very cool idea.
what a great museum! i love all the glass windows-great motivation.
looking forward to the finished projects!
Post a Comment